- Return to book
- Review this book
- About the author
- Introduction
- 1. Android
- 2. TDD with Robolectric
- 3. Architecture
- 4. Fundamentals
- 5. Resource System
- 6. Managing the Lifecycle
- 7. Lab: Calculator
- 8. Appendix
- 9. Epilogue
- 10. About The Author
- 11. Bibliography
Robolectric Integration
Step 1: Create Android project
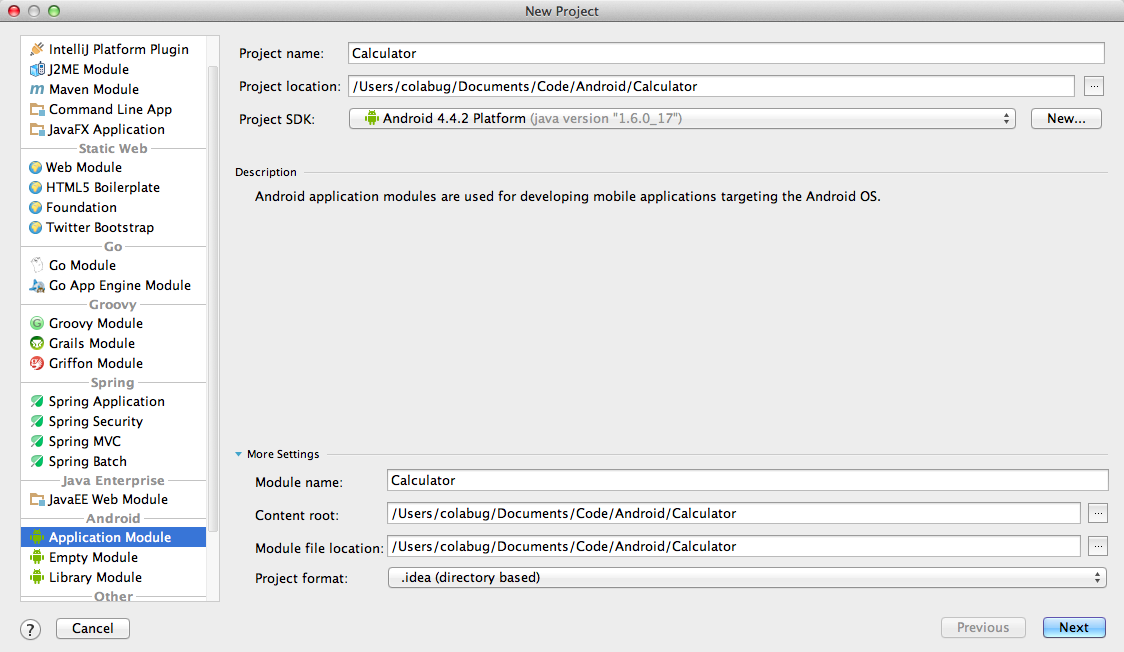
Use the IntelliJ Android wizard to create a Hello World project. First, choose the storage location and platform.
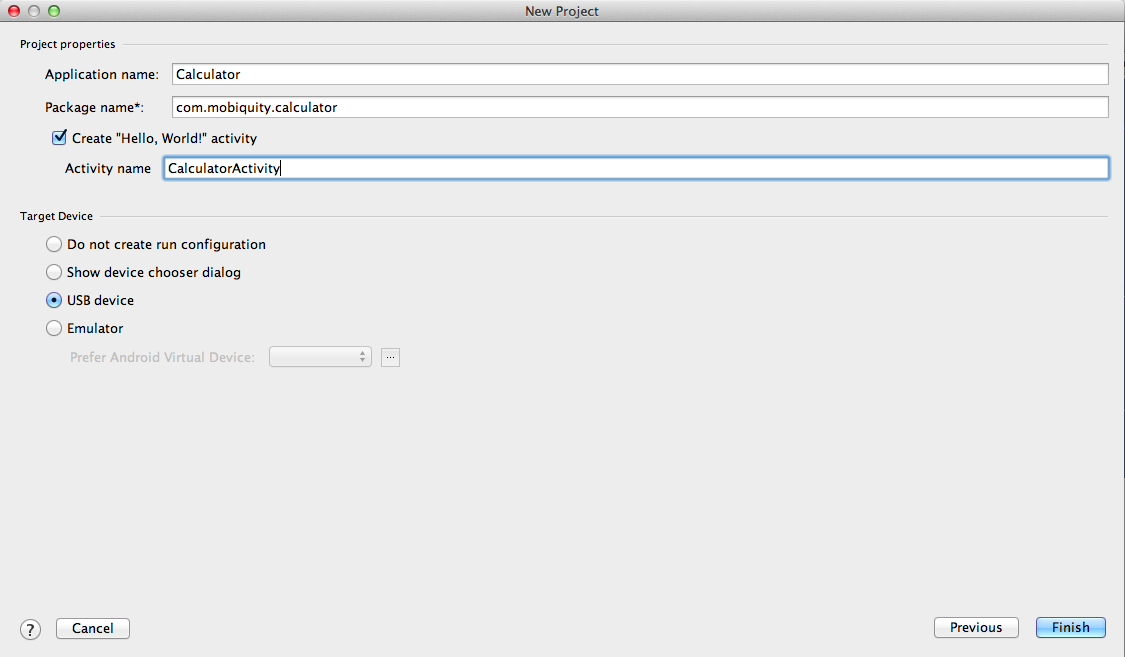
On the next screen:
- Name your application
Calculator - Create a "Hello, World! activity" and name it
CalculatorActivity - Set the package name to
com.mobiquity.calculator - Choose "USB device" as the "Target Device"
Step 2: Set up directories for maven
Use IntelliJ or the command line to move files into the following structure:
src/main/java/...
src/test/java/...
Note: IntelliJ might not like it when you add subdirectories to the folder marked as source. If you are having trouble setting up the directory structure, open the screen shown in the next step and remove the old source folder before adding new subfolders.
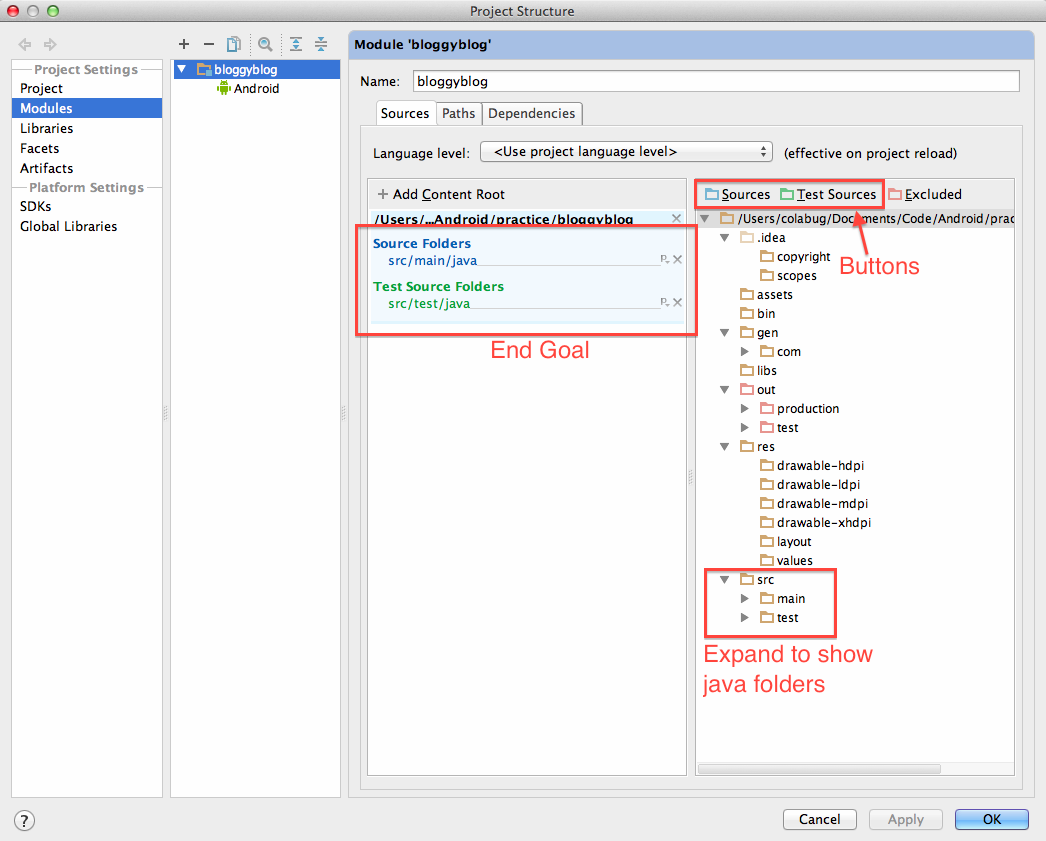
Step 3: Configure IntelliJ source and test folders
Update module settings in IntelliJ to recognize the source and test directories (below: blue folder is source and test folder is green).
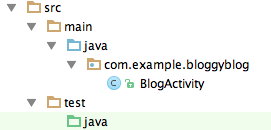
After you are done, your project should look something like this:
Step 4: Integrate Robolectric
Copy this sample pom.xml into live in the root of your project. Change the groupId to suit your project (e.g. com.mobiquity.calculator). If desired, also edit the artifactId, version, and name values.
Step 5: Maven
Check "Maven Projects" view in IntelliJ to ensure that it looks something like this:
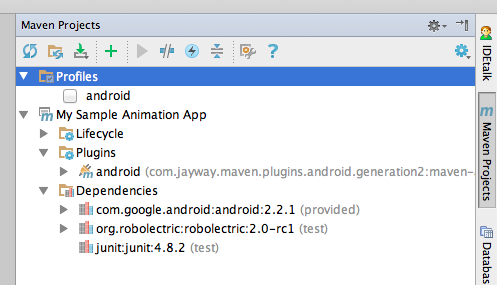
If you see errors, you may just need to refresh and wait for it to finish indexing/importing your libraries. It may help to run mvn install on the command line and restart IntelliJ.
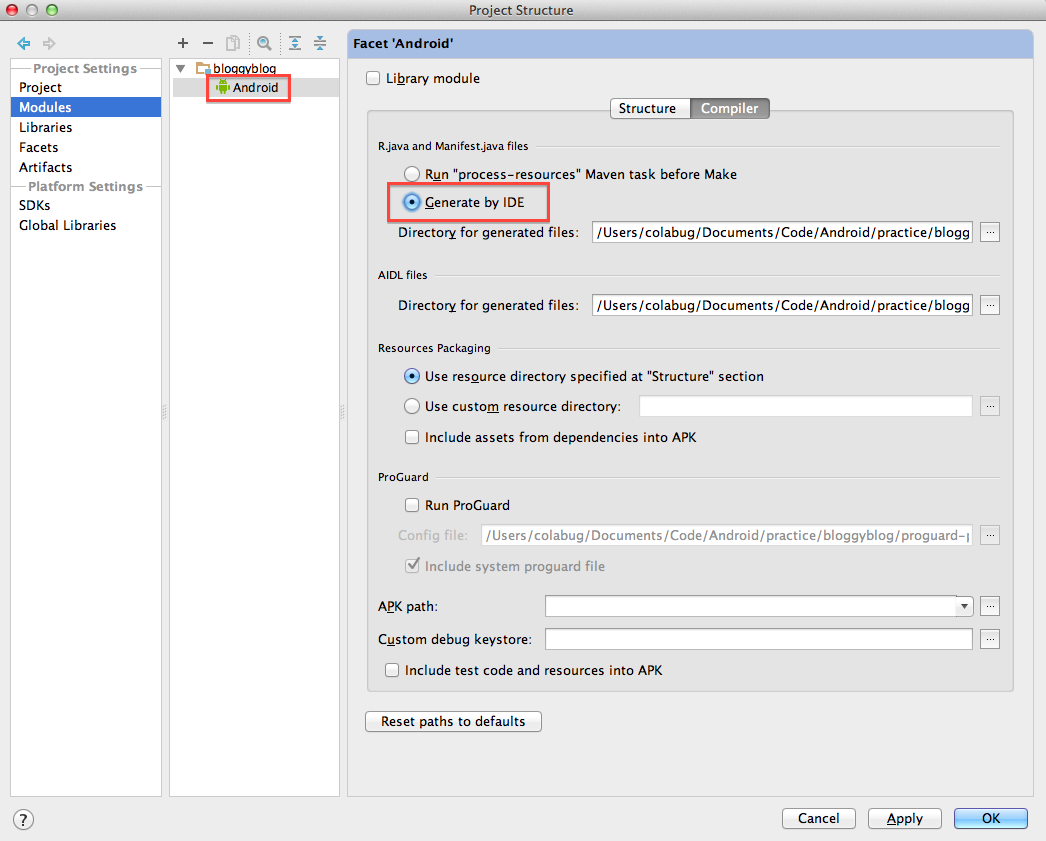
If you are still having issues, your Android facet may be the problem. Open the Android facet for your project and change to "Generate by IDE."
References
- Adapted from: Latislaw, C. August 3, 2012. Integrating Robolectric with IntelliJ. Retrieved from http://chariotsolutions.com/blog/post/integrating-robolectric-with-intellij/.